
While these scratches may be very tiny, the end result could be that the rocks do not polish to a high shine. Thorough cleaning is very important, so take your time and do a good job. You can use paper towels or an old toothbrush to clean the inside of the barrel. Pay particular attention to the seal area and the bottom edges of the barrel—lots of gunk might be trapped there and will not only contaminate your batch, but might cause the barrel to leak. If you opt to use a toothbrush, mark it as “coarse grind only,” so that you remember what step it can be used for. You should have a separate toothbrush for each step; you don’t want to contaminate the barrel the next time you are cleaning! This is where some folks pull out a second barrel reserved for just fine grit tumbling, to avoid most of the contamination. Normally the following steps are not repeated like the coarse step is (except possibly polish).
 Step 2: Fine Grind
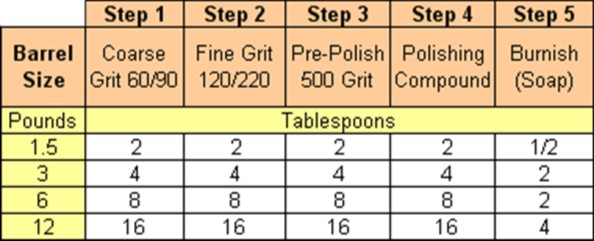
Once you have enough rocks for the fine grind, place them in a barrel and add 120-220 fine grit.
Add enough water to reach the bottom of the top layer of stones, but not so much that they are covered. If necessary, add plastic pellets to bring the volume of the barrel to at least 1/2 full. Check the seal area to be sure that it is clean and dry. Place the lid on the barrel and seal the barrel. Place the barrel on the tumbler and start the motor. Again, stick around for a few minutes to make sure the tumbler is functioning properly and the barrel isn’t leaking. Check back again in an hour, and periodically after that. Let the fine grind run 24 hours a day for 7 days or so, depending on the rock hardness, checking the rocks. They are ready for the pre-polish when they appear shiny when wet. Thoroughly clean like before. Again, some tumblers have a third barrel which they use only for pre-polish or for pre-polish and polish. If at any point a rock is chipped, it should be removed and recycled again to remove the chip.
Step 3: Pre-polish
Once you have enough rocks for the extra fine grind/pre-polish step, place them in a barrel that has been thoroughly cleaned. If you do not clean the barrel and stone thoroughly a few pieces of grit from the previous step will contaminate your pre-polish, which will produce scratches on your finished gemstones!
At this step some people use plastic tumbling pellets to cushion the rocks and fill the barrel back up. They help reduce chipping of the rocks, which creates a sharp edge, which will scratch the other rocks. However, pellets will also slow down the polishing process as well. After your barrel is about 2/3 to 3/4 full of rocks and pellets add water to slightly below the level of the rocks. Then add the 400-600 extra-fine grit—also called pre-polish—and seal the barrel and you are ready to tumble again.
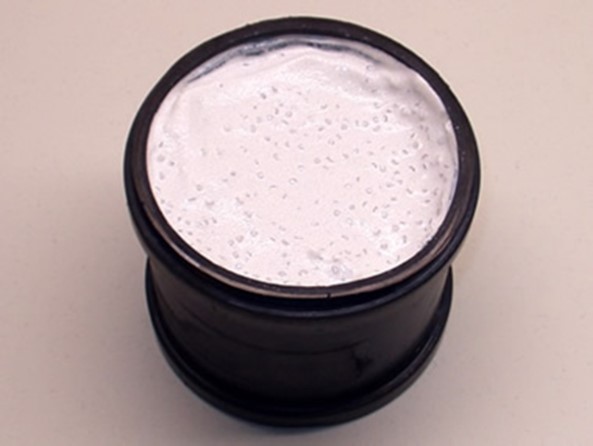
Run the pre-polish step 24 hours a day for 7 days or so depending on rock hardness. When you open the barrel, the rocks, slurry and pellets will look like a strange tapioca.
Now, gently pour the contents of the barrel into a colander. Rinse the rocks over a bucket or disposable container. (Remember: don’t pour the mud or used polish down a drain!)
To easily separate the rocks from the pellets, you can put them in a small container of clean water. The pellets will float to the top and can be skimmed off. These can be reused but you must put them in something labeled “pre-polish pellets,” so they can be used only in that cycle to avoid contamination. The rocks should now have a slight luster even when dry.
To make sure that the rocks are ready for polishing, perform this simple test: take an old towel or piece of felt and barely dampen it. Sprinkle a small amount of polishing powder on it and rub one of the rocks vigorously over the powder. If you see a definite shine, the rocks are ready to proceed to the polishing step. If there is no shine, or if the rocks don’t show any luster when dry; you should repeat the pre-polish step, checking every couple of days, until the desired results are achieved. It is likely that one of the steps was not continued long enough to do its work if this is the case.
Step 4: Polish
Clean the barrel, lid, and stones as before. Fill the barrel with stones, the appropriate amount of rock polish (which is often Cerium Oxide) as indicated in the table above, and water. Add plastic pellets for cushioning until the barrel’s volume is 2/3 to 3/4. Let the polish step run 24 hours a day for 10 days or so. Some folks will reduce the speed of their tumbler by about 20% if they are capable of it. Others will add some sawdust to further cushion the slurry. The rocks should look shiny whether they are wet or dry. If the rocks have not polished to a high gloss or appear to have a film on them, you may want to try burnishing them to see if they will gloss up a bit more. These used pellets should be placed in a container labeled “polish pellets”.
 Step 5: Burnishing
Just as before, clean the barrel, lid, and stones. You should be an expert at clean tumbling by now. Then, gently place the stones back in the barrel, and add soap according to the table above. Classic Ivory Soap is recommended—do not use a soap that contains abrasive particles. Grate or thinly slice the bar until you have the appropriate amount. Do not use liquid soap, as some of them contain oils that can harm the rubber barrel, break down the polish, and effectively unpolish your rocks. Add clean plastic pellets and water. Allow this mixture to run for 1-2 days to super clean your rocks.
When you open the barrel at the end of the burnishing step you will find a thick froth of suds. Under the suds are your sparkling gems. Rinse them with clean water and dry them off. Label the pellets “burnish pellets”.
A Few Rock Tumbler Tips and Reminders!
Plan for disposal of the used tumbler grit, polishing compound and tumbling slurry. Do not dump it down a household drain. The grit is very heavy and can settle into traps and pipes, clogging them and making a barrier that is difficult to penetrate with drain cleaning tools.
Patience is a virtue. If your rocks are not nicely shaped after the rough grind step, then run them through again. Converting tumbling rough into smooth, rounded gemstones takes time.
If, after burnishing, the stones are still not shiny, you will need to repeat a few steps. The most common reasons why stones may not show a brilliant gloss are:
1. Not cleaning the barrel and stones well enough after each step, or tumbling cracked or pitted rocks past the coarse grind. Tiny scratches from leftover grit may cause stones to not polish well.
2. Filling the barrel too full; which limits the tumbling action.
3. One of the steps may have been rushed.
4. The rocks that you are tumbling do not polish because they are too soft!
The two biggest keys to success in rock tumbling are patience and thorough cleaning. If the rocks show no shine, repeat the fine grind, pre-polish, polish, and /or burnishing steps.
If the rocks don’t show some shine, repeat the pre-polish, polish, and burnishing steps. Remove any rocks that are cracked or pitted. Let each step run for its full duration before proceeding to the next. If the rocks are soft, they will likely come out of the coarse grit looking a whole lot smaller than they did going in! And finally, take care to clean the stones and barrel extra well. Keeping these tips in mind and with a little more time, you should be able to see the difference. Remember, though, not all types of rock will polish to a high gloss. Generally speaking, harder stones will take a higher shine. If you are tumbling a batch of low hardness materials, a soft luster may be the end result.
Don’t hesitate to ask for advice. If you purchased tumbling rough from a rock shop they might recommend a specific polishing compound for desired results. If you collected your rock locally, ask experienced rock hounds or members of the club if the material you collected is capable of developing a polish, or requires a specific tumbling recipe. White lines on the rocks is polish stuck in the cracks, which can be scrubbed out. (and then probably ground out smooth)
The art of lapidary is, indeed, quite multifaceted. As with any art, it takes practice to achieve optimal results. If you have problems at first, don’t give up! With enough patience and a bit of grit, any beginning rock hound who’s rough around the edges can become a polished expert. Good luck and have fun!
Uses of Tumble-Polished Stones
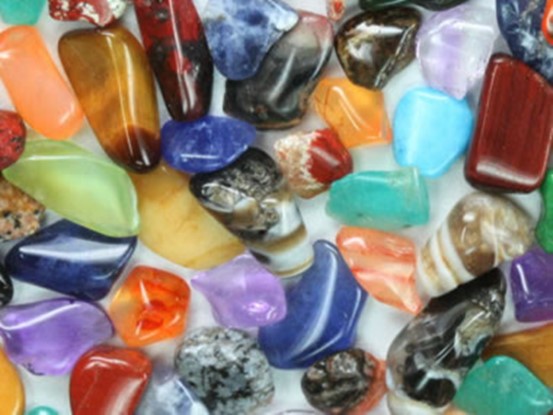
Tumbled gemstones are used to make jewelry, craft projects and other decorative items. They are also widely collected by people who appreciate their beauty. They are especially enjoyed by children.
Tumbled gemstones are extremely popular in gift shops–especially gift shops found at science centers, caverns and other natural science attractions. Many geologists obtained their first interest in rocks and minerals when they received tumbled stones as a gift or discovered them in a store.